Leave Your Message

How to Choose the Right Mirror Wall for Your Space?

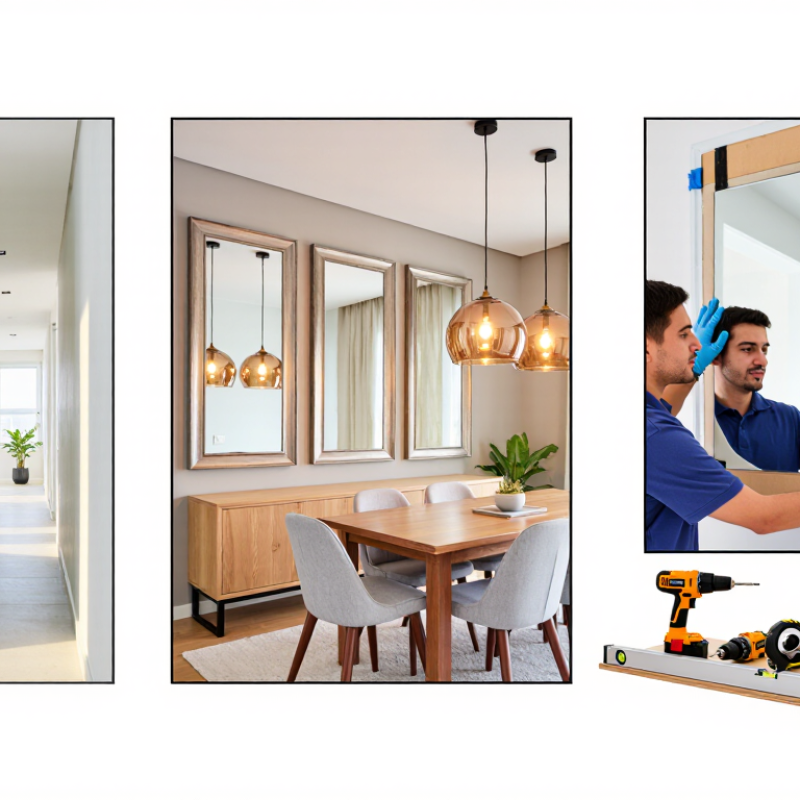
Choosing the right Mirror Wall begins with more than measuring a blank surface. The wall must support the mirror’s weight, reflect useful light, and suit the room’s daily movement. A narrow hallway may benefit from full-height panels, while a dining area may need softer, framed sections. The wrong scale can make a room feel crowded. Sometimes, less glass works better.

Interior designer Kelly Wearstler said, “The details are not the details. They make the design.” That principle applies strongly to Mirror Wall planning. Panel spacing, edge finishing, frame color, and reflection angles can change the entire atmosphere. Before ordering, inspect the room at different times of day. Morning glare may reveal problems that evening lighting hides. A sample panel helps, but it cannot show every reflection.

Safety and installation quality deserve equal attention. Choose suitable glass thickness, polished edges, and safety backing where appropriate. Moisture-prone rooms require materials and adhesives designed for those conditions. Large panels should be handled and secured by qualified installers. Even excellent design can fail through poor fitting. That is an uncomfortable point, but an important one.

This guide will examine room proportions, lighting, materials, maintenance, and installation details. It will also question popular assumptions. A Mirror Wall does not automatically make a space larger. It may duplicate clutter instead. The best choice balances visual impact with comfort, durability, and everyday practicality.
How to Choose the Right Mirror Wall for Your Space?

Define Your Space’s Needs and Mirror Wall Goals

Before choosing a mirror wall, define what the space must accomplish. Is it enlarging a narrow hallway, improving a dim studio, or supporting movement in a fitness room? Measure the wall, ceiling height, nearby doors, and the strongest light source. The U.S. Environmental Protection Agency reports that people spend about 90% of their time indoors. That makes visual comfort a practical design goal, not decoration alone.

A mirror wall should reflect useful light without creating glare. The International Energy Agency reports that lighting represents about 15% of global electricity consumption. A well-positioned mirror can help distribute existing daylight and reduce the need for extra fixtures, although it cannot replace efficient lighting. Test the reflection from seated and standing positions. Check whether it shows clutter, harsh bulbs, or an unattractive corner. Small details matter.

Safety and maintenance also define the goal. In a busy room, specify impact-resistant backing, secure installation, rounded edge treatment, and easy access for cleaning. In humid areas, confirm that adhesives and fixings suit moisture exposure. I once focused too much on visual width and ignored finger marks near the entrance. That choice looked polished for one day. The better plan considers daily use, cleaning time, privacy, and future furniture changes. Houzz research consistently shows that homeowners prioritize functional improvements during renovations, so appearance should serve the room’s real routine.
Measure the Wall and Assess Available Light

How to Choose the Right Mirror Wall for Your Space?

Measure the wall before choosing a mirror wall. Record its width, height, skirting boards, outlets, switches, and door clearance. Leave practical access around sockets and ventilation grilles. A wall that looks empty may become crowded quickly. I once measured only the visible plaster and missed a radiator. That mistake changed the installation plan.

Light matters just as much as size. Use a basic lux meter at eye level, both morning and evening. The Illuminating Engineering Society’s Lighting Handbook commonly places office task lighting near 300–500 lux, depending on the activity. If your wall receives weak daylight, choose a position near, but not directly opposite, a window. Direct reflections can create glare and make a room feel uncomfortable. The Commission Internationale de l’Éclairage identifies luminance balance and glare control as important parts of visual comfort.

Check how the mirror will reflect real objects. A large mirror facing a bright window may double the visual brightness, but it can also reflect clutter, blinds, or harsh afternoon sun. The U.S. Department of Energy reports that daylight-responsive lighting strategies can reduce lighting energy use in suitable spaces, although results vary by room and controls. Do not treat a mirror as a lighting solution. Test a cardboard outline on the wall first. Walk past it. Sit beneath the main light. The correct size may still feel wrong. That is worth noticing.

How to Choose the Right Mirror Wall for Your Space?

Measure the wall first, then check the available light at the intended mirror position. The chart shows practical illuminance reference levels in lux: general areas typically need around 100–200 lux, while grooming or detailed viewing benefits from approximately 300–500 lux.

Use a light meter or smartphone sensor to measure the wall at different times of day. If the reading is below about 300 lux, consider adding balanced lighting beside or above the mirror. Keep the mirror width proportionate to the clear wall width and leave enough space for switches, furniture, and circulation.

Compare Mirror Wall Types, Shapes, and Frame Options

How to Choose the Right Mirror Wall for Your Space?

Mirror walls vary in construction, scale, and visual effect. A full-panel wall creates the strongest sense of openness, especially in narrow hallways or compact bathrooms. Mirror tiles offer easier replacement and more flexible layouts. However, their seams can collect dust and interrupt reflected light. According to Grand View Research, the global decorative wall mirror market was valued at about $3.9 billion in 2022, showing continued demand for reflective interior features.

Shape changes the room’s mood. Rectangular mirrors suit clean, architectural interiors and maximize reflection. Round or arched mirrors soften hard edges and work well above curved furniture. Oversized panels can double perceived depth, but poor placement may reflect clutter, doors, or harsh lighting. The National Association of Realtors’ 2022 Remodeling Impact Report estimated a 71% cost recovery for bathroom renovations, although a mirror wall alone should not be treated as a guaranteed investment. That assumption needs caution.

Tips: Match the mirror type to maintenance needs. Choose moisture-resistant backing for humid rooms. Use framed mirrors when you want definition and easier edge protection. Select frameless panels for a quieter, continuous effect. Thin metal frames feel precise; timber frames add warmth. Before installation, stand at the intended viewpoint and check what the mirror reflects. This simple test is often missed. For large panels, use safety-backed glass and qualified installation support. Minor distortion may be acceptable, but uneven reflections usually signal poor measurements or an unsuitable wall.

Match the Mirror Design With Your Room’s Style and Function

Choosing a mirror wall begins with the room’s visual language, not its available wall space. A slim, frameless panel suits minimalist interiors because it keeps grout lines and visual noise low. Traditional rooms usually benefit from framed mirrors, warmer metal finishes, or softly curved silhouettes. In an entryway, a full-height mirror can reflect daylight and make a narrow corridor feel wider. In a bathroom, however, scale must follow the vanity, lighting, and user height. Function comes first.

The U.S. Department of Energy reports that effective daylighting can reduce lighting energy use by up to 75 percent in suitable buildings. A well-placed mirror wall can support that effect, but careless placement may create glare. ENERGY STAR also reports that LED lighting uses at least 75 percent less energy than incandescent lighting. Pairing efficient LEDs with a mirror prevents harsh shadows around the face. Use vertical sconces beside the mirror, not only overhead fixtures. Measure twice.

In practice, designers should check reflections before installation. A mirror facing an untidy storage area may enlarge the wrong view. A tinted surface can add depth, yet it may weaken color accuracy during grooming. Safety-backed glass is sensible in busy homes, especially near children. I would also question the popular wall-to-wall approach; it can feel cold when the room lacks wood, fabric, or textured finishes. The right mirror design should reflect the room’s purpose, not merely make the room look larger.

Check Installation, Safety, Maintenance, and Budget Requirements

How to Choose the Right Mirror Wall for Your Space?

Check Installation, Safety, Maintenance, and Budget Requirements

A mirror wall begins with the wall behind it. Check whether the surface is flat, dry, clean, and strong enough for the panels. Uneven plaster can create visible waves and stress points. Measure the height twice, including skirting boards, sockets, and door clearances. A qualified installer should select suitable anchors or adhesive for the wall material. Heavy panels need secure support. Do not rely on guesswork.

Safety deserves careful attention. Choose panels with polished edges, safety backing, or laminated construction where appropriate. In busy homes, gyms, and commercial spaces, impact protection matters. Keep mirrors away from areas where furniture may strike them. Bathrooms need proper ventilation, sealed edges, and moisture-resistant installation materials. Local building requirements may also affect the design. Ask for written installation guidance.

Maintenance is simple when planned well. Use a soft microfiber cloth and a mild, non-abrasive cleaner. Wipe spills quickly, especially near panel edges. Avoid soaking joints or spraying cleaner directly onto the mirror. Budget beyond the mirror itself. Include wall preparation, transport, trims, labor, lighting adjustments, and future repairs. The cheapest quote may exclude important work. I would not pretend every measurement is perfect, so allow a small contingency. A slightly higher budget can prevent cracked panels, loose edges, and expensive reinstallation.

How to Choose the Right Mirror Wall for Your Space?

Compare installation, safety, maintenance, and budget requirements before selecting a mirror wall solution.

Mirror Wall Option Best Use Installation Requirements Safety Considerations Maintenance Needs Typical Service Life Indicative Planning Cost Main Advantages Important Limitations
Standard Silvered Glass Mirror Panels Bedrooms, living rooms, retail displays, and decorative feature walls A flat, dry, structurally sound wall is required. Use a suitable mirror adhesive or mechanical fixing system, with expansion gaps between large panels. Panels should be handled and installed by trained professionals. Conventional mirror glass can break into sharp pieces. Use safety-backed glass, edge protection, secure fixings, and avoid installation where impact is likely. Clean with a soft microfiber cloth and a non-abrasive, ammonia-free glass cleaner. Keep liquid away from exposed edges and the backing. Approximately 10–20 years indoors when the backing remains dry and undamaged Approximately USD $20–$50 per sq. ft. for material and typical installation; local labor and access can change the total. Clear reflection, premium appearance, strong scratch resistance, and many shape options Heavy, breakable, and sensitive to moisture reaching the backing or edges
Safety-Backed or Safety-Film Glass Mirror Gyms, dance studios, hospitality areas, corridors, and higher-traffic interiors Requires accurate wall measurement, continuous support or approved mechanical fixings, and carefully sealed joints. The wall must be able to support the glass weight, typically about 10 kg/m² for 4 mm glass before framing or hardware. A safety film or safety backing helps retain broken fragments, but it does not make the mirror unbreakable. Use impact-resistant specifications and comply with local building and glazing requirements. Use a soft cloth and mild cleaner. Inspect corners, joints, fixings, and backing periodically, especially in busy or humid areas. Approximately 10–20 years indoors, depending on impact, humidity, and edge protection Approximately USD $25–$65 per sq. ft. for material and typical installation Improved fragment retention, professional appearance, and better suitability for public spaces Costs more than basic mirror glass and still requires careful handling and secure installation
Acrylic Mirror Panels Children’s areas, temporary displays, mobile installations, and locations where low weight matters Panels can be installed with mechanical fasteners, compatible adhesive, or a framed system. Allow for thermal movement and use a flat backing surface to reduce distortion. Acrylic is lighter and more impact-resistant than glass, but it can crack or develop sharp edges under severe impact. Keep protective film on until installation is complete and finish exposed edges properly. Clean only with a soft microfiber cloth, mild soap solution, and clean water. Avoid abrasive cleaners, paper towels, solvents, and ammonia-based products because they can scratch or damage the surface. Approximately 5–15 years indoors, depending on scratching, cleaning practices, and ultraviolet exposure Approximately USD $15–$40 per sq. ft. for material and typical installation Lightweight, easier to transport, and less likely to shatter like ordinary glass More prone to scratches, can show optical distortion, and may expand or contract with temperature
Full-Height Framed Mirror Wall Entrances, dressing areas, hotels, restaurants, and residential statement walls Requires precise floor-to-ceiling measurement, level framing, and secure anchoring into suitable wall or floor structures. Heavy panels may require two-person or specialist handling. The frame protects exposed edges and can improve stability. Select safety-backed glass where people may walk close to the wall or where impact is foreseeable. Clean the mirror and frame separately. Check frame joints, anchors, and sealants annually, and repair any loose components or moisture damage promptly. Approximately 15–25 years indoors with sound framing and controlled moisture Approximately USD $35–$90 per sq. ft. for material, framing, and typical installation Strong visual impact, protected edges, and a finished architectural appearance Higher cost, greater weight, and more complex delivery and installation
Mirrored Wall Tiles or Modular Panels Feature walls, columns, small rooms, retail interiors, and projects requiring phased installation Requires a carefully leveled substrate and consistent joint layout. Modular panels are easier to replace, but every joint must be aligned and securely supported. Smaller sections can reduce handling risk. Use safety-backed units in public or high-traffic areas and avoid sharp exposed corners. Clean each panel with a soft cloth and check grout, trim, or joint sealants for deterioration. Replace damaged modules rather than attempting to repair cracked glass. Approximately 10–20 years indoors, depending on panel quality and joint protection Approximately USD $25–$70 per sq. ft. for material and typical installation Flexible layout, easier localized replacement, and reduced handling size More visible joints, greater cleaning time, and possible alignment issues on uneven walls
Antique, Tinted, or Decorative Mirror Wall Restaurants, lounges, retail interiors, hospitality spaces, and design-focused residences Installation requirements are similar to glass mirror panels, but color, texture, and pattern matching require detailed drawings and careful panel sequencing. Use safety backing where required. Decorative finishes may make damage less obvious, so inspect for cracks, loose panels, and backing deterioration. Follow the finish-specific cleaning instructions. Avoid harsh chemicals, abrasive tools, and excessive moisture around edges and joints. Approximately 10–20 years indoors when protected from moisture and impact Approximately USD $35–$100+ per sq. ft. for material and typical installation Distinctive appearance, reduced visibility of minor marks, and strong design flexibility Higher material cost, limited availability, and more difficult color or pattern replacement

Planning note: Costs are broad U.S. planning ranges in USD per square foot and exclude major wall repairs, electrical work, unusual access, demolition, taxes, and permits. Confirm the final specification with a qualified installer and check applicable local glazing, fire, accessibility, and building regulations.